
📚 Course contents
Young Inventors, lesson 20 of 20
Basic Electronics for Kids: A Simple Guide for Ages 8–13
Electronics is how we make electricity do useful jobs: light a torch, ring a doorbell, spin a fan or run a phone. In basic electronics, kids learn a few simple parts (a battery, wires, a switch, an LED and a resistor) and how to join them into a circuit, a loop the electricity can flow around.
You don't need to be good at maths to start. If you can build with LEGO, you can build a circuit. This guide takes you from "what is electricity?" to your very first working circuit, one small step at a time.
What is electricity?
Everything around you is made of tiny particles called atoms. Inside atoms are even tinier things called electrons. When lots of electrons move along a wire together, that moving flow is electricity.
1.5 V. The higher the hill, the harder the water pushes and the faster the wheel turns. A battery's push is called its voltage.
Scientists give these ideas names:
| Word | What it means | In the water picture |
|---|---|---|
| Voltage (volts, V) | How hard the battery pushes | How high the tank is |
| Current (amps, A) | How much electricity flows | How much water flows |
| Resistance (ohms, Ω) | How much something slows the flow | A narrow bit of pipe |
Want to play with these three? Try the sliders in What is current?.
The first parts every young inventor needs
Electronic parts are called components. Here are the ones you'll meet first.
Resistor: Slows electricity down. It's like a bumpy road.
1. Battery: the push
A battery stores energy and pushes electricity out of its + (positive) end, around the circuit and back into its − (negative) end. An AA cell gives 1.5 V; a square 9 V battery gives 9 V.
Learn more: What is a Battery?
2. Wires: the roads
Wires are made of copper, a metal that lets electricity through easily, covered in plastic so it can't leak out or touch you.
3. Switch: the gate
A switch opens or closes a gap in the circuit. Closed = electricity flows and the light is on. Open = the road is broken and everything stops.
Learn more: What is a Switch?
4. LED: the light
An LED (light-emitting diode) is a tiny light that uses very little power. It's a one-way door: electricity can only go through it one way. The long leg goes towards +, the short leg towards −.
Learn more: What is a Light Emitting Diode?
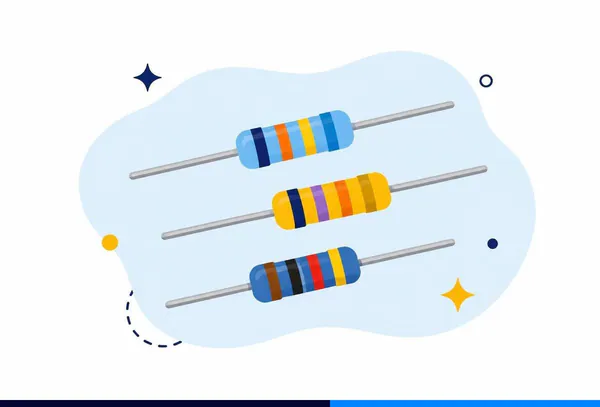
5. Resistor: the tap
A resistor slows the electricity down. An LED is greedy: without a resistor it takes too much and burns out. The resistor is the tap that gives it just enough.
Learn more: What is a Resistor? and Why does an LED need a resistor?
6. Buzzer and motor: sound and movement
A buzzer beeps when electricity flows through it. A small DC motor spins, and with a fan blade on top you've made a fan.
7. Breadboard: the building board
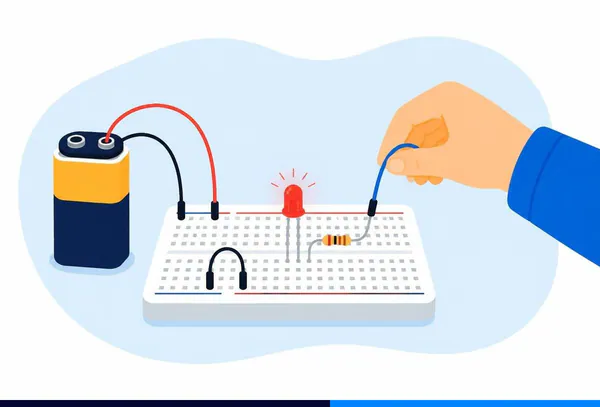
A breadboard lets you build circuits by pushing parts into holes, with no soldering. Hidden metal strips inside join each row together.
Power rail: every hole along this long line is joined, so the battery connects here. Tap any hole to see what it's joined to.
You can see all of these together in Basic Electronic Components Every Beginner Should Know.
What is a circuit?
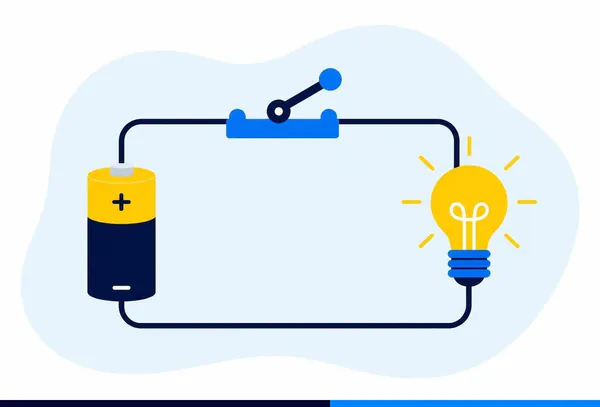
A circuit is a complete loop. Electricity leaves the battery's + end, goes through the parts, and comes back to the − end. If there's a gap anywhere, nothing works.
A torch is the simplest circuit there is: a battery, a switch and a bulb, joined in a loop. Press the switch to close the gap and the bulb lights.
Switch on. The loop is closed, so electricity flows out of +, through the switch and the bulb, and back into −. The bulb lights.
Conductors and insulators
Some things let electricity through, and some don't.
- Conductors let it flow: copper, aluminium foil, steel spoons, and even a pencil's graphite.
- Insulators stop it: plastic, rubber, wood, glass and paper.
That's why wires are metal on the inside and plastic on the outside. Test some things yourself:
Copper wire: conductor. Metal lets electricity flow through it, so the circuit is complete and the bulb lights.
Then build the game that uses this idea: The Wire Buzzer Game.
Stay safe: the golden rules
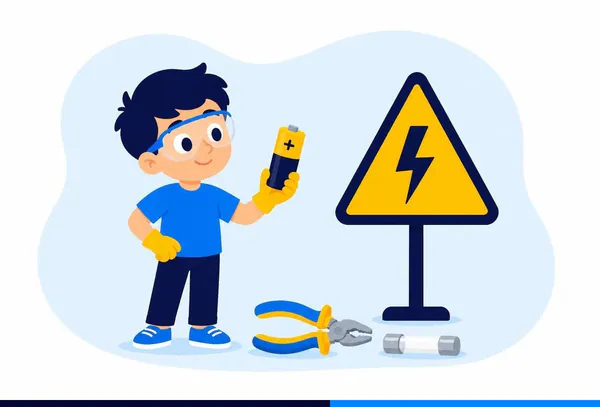
Small batteries (1.5 V to 9 V) are safe for kids to play with. The electricity in the wall socket is not. In India it's 230 V, strong enough to hurt or kill.
Danger! Water lets electricity flow easily, so a big current rushes through the body and out through the wet feet into the ground.
- Never put anything into a wall socket, and never open anything that plugs into the wall.
- Use only batteries for your projects (AA, AAA or 9 V).
- Never join + straight to − with a wire. That's a short circuit: the battery gets hot and can leak or burn.
- Keep electricity away from water and wet hands.
- If a part gets hot, smells or smokes, disconnect the battery and tell an adult.
- Keep button cells away from little brothers and sisters. They are dangerous if swallowed.
Read the full list: Basic Safety for Young Engineers.
Build your first circuit: light an LED
You'll need:
- a 9 V battery and a battery clip (or 2 AA cells in a holder)
- one LED (any colour)
- one resistor: 470 Ω for 9 V (yellow-violet-brown), or 100 Ω for 2 AA cells (brown-black-brown)
- a breadboard and a few jumper wires
- optional: a push button
Steps:
- Push the LED into the breadboard so its two legs are in different rows. Remember which row has the long leg.
- Put one end of the resistor in the same row as the long leg, and the other end in an empty row.
- Connect the battery's red (+) wire to the resistor's free row.
- Connect the battery's black (−) wire to the row with the LED's short leg.
- Your LED should glow! 🎉
It doesn't light? Check these, one at a time:
- Is the LED the right way round? Turn it around and try again. It won't break.
- Is each leg really in a different row?
- Is the battery clip pushed on firmly?
- Is the battery flat? Try a new one.
Make it better: put a push button between the battery's + and the resistor. Now the LED only lights while you press. You've made a doorbell light!
Step-by-step with pictures: How to Connect a Basic Circuit for Kids and Getting Started with a Basic Electronic Circuit.
Electronics is everywhere
Once you know these parts, you'll spot them all over the house:
- A TV remote has a battery, buttons (switches) and an invisible infrared LED at the front. Look at it through a phone camera while pressing a button, and you'll see it flash!
- A doorbell is a switch and a buzzer.
- A phone has billions of tiny switches called transistors inside its chips.
- An automatic street light uses a light sensor to switch on when it gets dark.
What can you build next?
Here's the path through our free Young Inventors course:
| Step | What you'll learn | Lesson |
|---|---|---|
| 1 | How this course works | Welcome, Young Inventor! |
| 2 | Safety first | Basic Safety for Young Engineers |
| 3 | Batteries | What is a Battery? |
| 4 | AC and DC | What is AC and DC? Is it harmful? |
| 5 | Resistors | What is a Resistor? |
| 6 | Capacitors | What is a Capacitor? |
| 7 | Series and parallel | Resistors in Series and Parallel |
| 8 | A knob that controls light | How to Use a Potentiometer |
| 9 | A game to build | The Wire Buzzer Game |
| 10 | Your first Arduino | What is Arduino?, then Blink an LED with mBlock |
Want to practise without any parts? Build circuits on screen in the free Circuit Sandbox, or play the electronics games.
Check what you learnt
In the water-pipe picture, what is the battery?
Your LED won't light. What should you try first?
Which of these is an insulator?
What is a short circuit?
Questions parents and teachers ask
What age can kids start learning electronics? From about 8, with simple battery circuits and an adult nearby. By 10–13 most kids can build breadboard circuits on their own and start coding an Arduino with blocks (mBlock).
Is it safe? Yes, with batteries. Projects in this guide use 1.5 V to 9 V, which can't give you a shock. The danger is mains electricity from the wall, so the rule is simple: batteries only.
What should I buy to start? A basic starter kit with a breadboard, jumper wires, LEDs, resistors (100 Ω, 220 Ω, 470 Ω, 1 kΩ), push buttons, a buzzer, a 9 V battery clip and AA cell holder. An Arduino Uno can come later.
Do kids need to know maths? Not to start. Building comes first. The simple maths (like Ohm's law) makes sense later, once kids have seen it working.
Conclusion
Basic electronics is a few simple ideas: a battery pushes, wires carry, a switch opens and closes the road, a resistor slows things down, and an LED lights up, all in a complete loop. Learn those, keep to battery power, and you're ready to invent anything from a doorbell to a robot.
Start with lesson 1 of the free Young Inventors course, and have fun!